Step 4 - Derived Data
The purpose of the Derived tab is to make the mapping of your Derived Dataset to the appropriate raw data. In some cases, the data being mapped may need to be transformed or changed, which can be done through the use of the Custom type, which will be explained in detail below.
Steps to Create Derived Data
-
From the Mapping Template Manager screen, select the Derived tab option
-
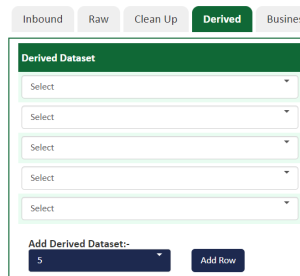
The Derived tab will open. If it is the first time you are opening the tab and no values have yet been created, the tab will be blank other than a header and an drop-down menu titled Add Derived Dataset and an Add Row button:


-
Use the Add Derived Dataset drop-down list to select the number of fields to add. For example, if you need 10 derived fields, select the corresponding number from the drop-down list and then click Add Row.
-
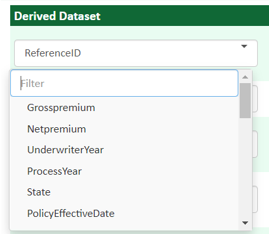
Use the Derived Dataset field drop-down list to select fields defined as a derived field as defined in the Master Data Setup. In other words, if a user is expecting a Derived value to appear in the drop-down, they must first have created the field in the Master Data.
-
The system automatically populates the Field Code and Data Type values. The values come from the Master Data setup. In the example below, the Field Code is the same as the Derived Dataset field name and the Data Type is String. If the Data Type needed to be changed, the user would find this derived data field in the Master Data Setup and update the data type there:

-
Field Node is where the information for the Derived data is coming from. A Field Node is basically the pre-defined grouping, or tier, of data that this information resides. Basically the From side of the From-To data equation. Note: Field Node Mapping must be pre-defined as part of your Bordereaux set-up.
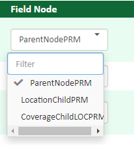
In the example above, we can see that the field in question, ReferenceID, resides in three (3) different field nodes; specifically, the Parent (or main) node, a location node (LocationChildPRM) and a coverage node (CoverageChildLOCPRM).
-
In the Type field, a drop-down allows selection of the manner in which the derived data element is to be mapped. The Mapping field value (3rd column in table below) will be based on the Type selected:
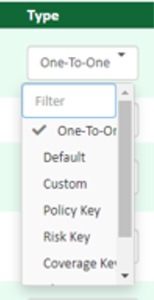
The options are as follows:
|
Mapping Type |
Description |
Mapping |
|---|---|---|
|
One-To-One |
With this method, this means that there is a one-to-one mapping between the Derived Data item and a Raw Data element (For example, ReferenceID maps one-to-one with BondNumber, a raw field) |
Select Raw Data field information is coming from for this field |
|
Default |
Allows for entering a constant, default value that will always appear. For example, PolicyKey may always equate to a value of PK. Or there might be a field that a end system is looking for a value to, that isn’t provided by a MGA. So for example a default of Null might always be populated in a derived field |
Enter in a default value for the field. For example, NULL could be a default value or ! if a downstream system requires this for a symbol |
|
Custom |
This allows the workflow canvas to open and where you can create specific criteria to populate a field. For example, a rule might be created where if a Policy Effective Date is prior to 01/01/1980, the field will default to No or Yes if the Policy Effective Data is greater than or equal to 01/01/1980. The canvas allows for comparisons, look-ups and combinations of means to populate the derived field with an appropriate Raw, Derived, or Look-up value |
See Step 5 - Business Rulesdocumentation for detailed instruction on how to configure a custom rule |
|
Policy Key |
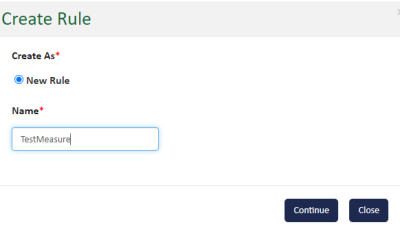
This allows for the creation of a unique Policy Key. On selection, the Create Rule window will open up and the user can create the Policy (level) Key:
|
See Step 5 - Business Rules documentation for detailed instruction on how to configure a custom rule |
|
Risk Key |
Same as above, except creation of a unique identifier at the Risk level |
See Step 5 - Business Rulesdocumentation for detailed instruction on how to configure a custom rule |
|
Coverage Key |
Same as Policy Key, except for the creation of a unique Coverage level identifier for a record |
See Step 5 - Business Rules documentation for detailed instruction on how to configure a custom rule |
|
Measure |
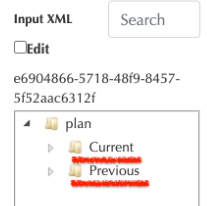
This option is only available to numeric datatype fields (such as an integer or decimal). If the field is a different datatype, an error message displays. When you select the Measure option, the Create Rule dialog opens. Use it to create a measurement comparison (determine the delta) based on a given field’s current transaction value and a previous transaction value. The delta is mapped to a derived field.
|
See Step 5 - Business Rules documentation for detailed instruction on how to configure a custom rule |
-
In the Field Node field, use the drop-down to select the Source Field Node. (This is essentially the same functionality as Step 6 above, except you are now defining where the data is being sourced or derived from).
-
When you have completed identifying the Derived Dataset, click Save Plan to preserve your work.
|
|
Save your work periodically to ensure work isn’t lost in case connection to the environment is lost unintentionally. |
-
The Delete button at the end of any Derived Dataset row allows the user to remove the row from the dataset.
