The system allows users to view and correct data records that failed the Bordereau validation process.
To begin, open the Owit Bordereau tool navigation panel, select the option, Record Review.
The Record Review page will open and, by default, the most recently processed Bordereau with failed records, those records will automatically be displayed. If this is the first time executing a Bordereaux and/or there are no errors, the page will be blank other than the header information.
If a bordereaux template has been executed, and errors occurred in the records, the ones with errors appear, as shown below:
At the end of each Record Review row, there is an Action button as shown below:
Clicking View History will open the Record History screen. This will display a history of the processing of the record (basically how many times it was executed and by whom, on what date, what the record status was etc).

Clicking Change History will pop-up the Change History window. This window will show the manual changes that were made against the record. In the example shown below, the Policy Effective Date of the record was updated from 02/28/2020 to 02/28/2021.
When you click Open, the individual Record Review screen displays which consists of two sections:
Looking at the header first, as shown in the example below, Errors and Warnings will be displayed in red and orange boxes respectively, on the right hand side of the screen:
As shown in the example, this record had an Error where a Business Rule relative to Transaction Sequencing was violated. In this case, the record would NOT be included in any Data Outputs for this Template until the Error condition was corrected. Correcting a record that is in Error can be done within this screen, as will be demonstrated later in this document.
The example also shows that the record being displayed encountered a Warning condition as well. In this case, the processing year was the same as the underwriting year which may warrant further scrutiny and possible correction before allowing the record to be included in Data Outputs for this Template.
To clear the Error and Warning messages from the screen, simply click the white x box in the upper right hand corner of each error/warning window that displays. Once all are cleared, the entirety of the header may be seen, as shown below:

The whole header consists of the following information:
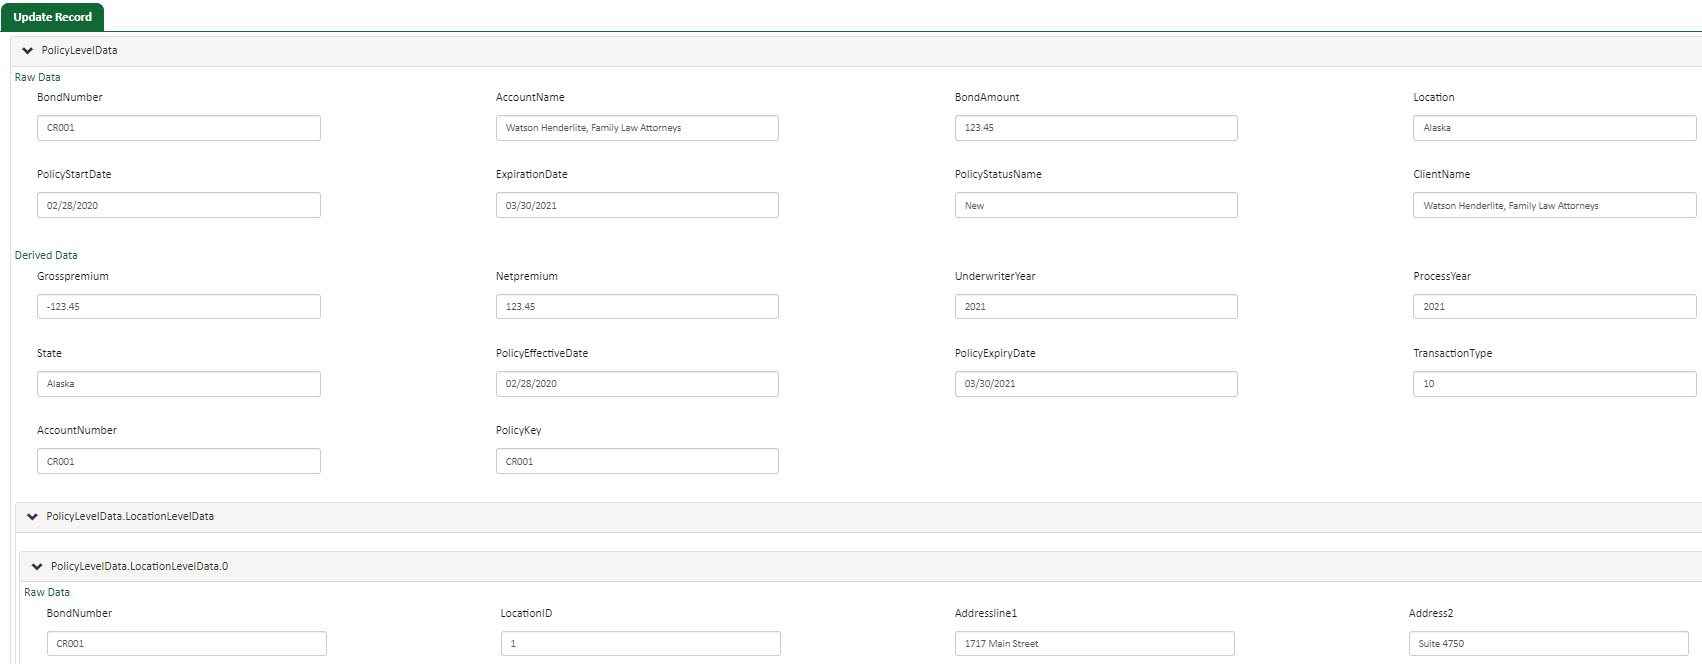
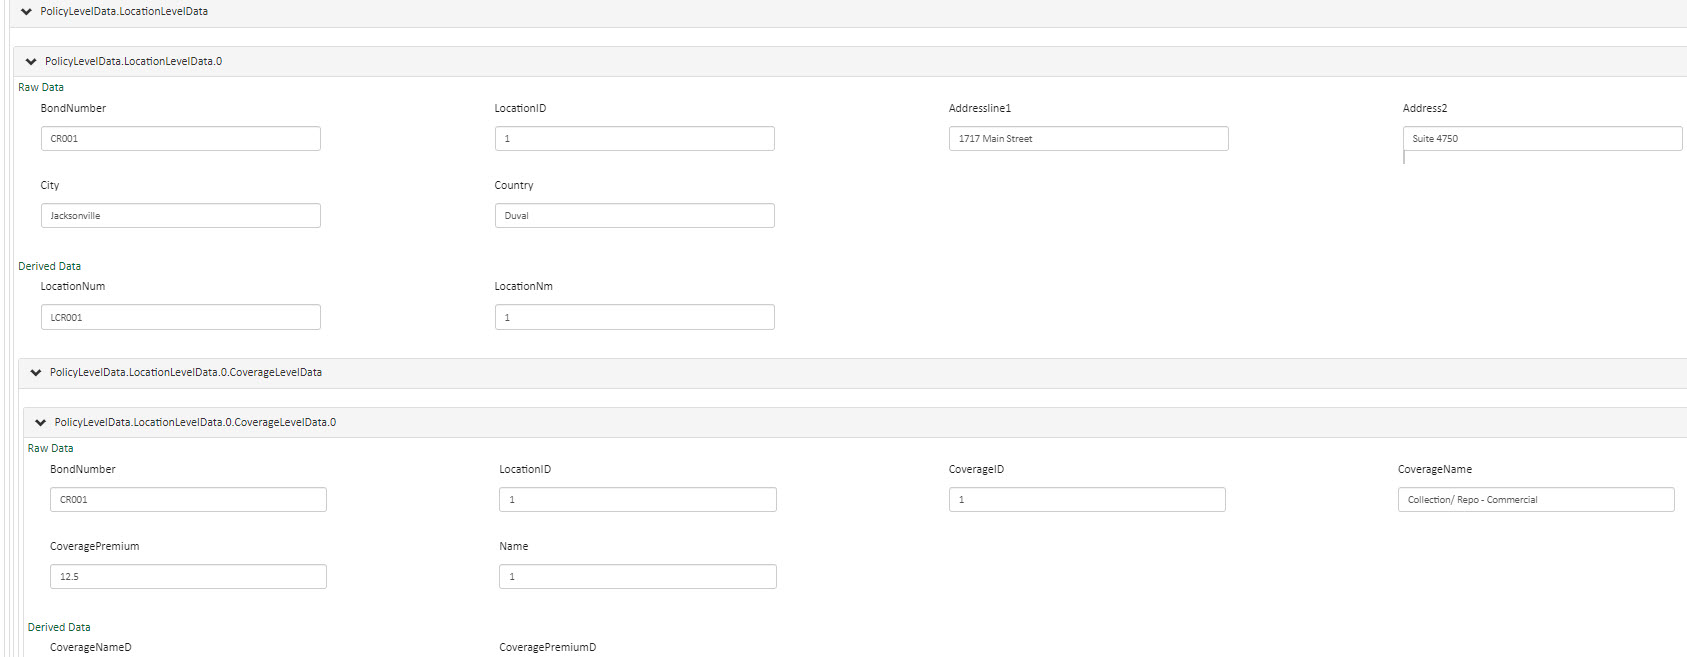
The next section of the screen provides both Raw and Derived information for the record, displayed in a hierarchical view. The screen sample below shows a small example of a hierarchy where the highest level is the policy data. Within that section, the user can see first the Raw Data, followed by the Derived data. The next section of data relates to LocationLevel and when expanded, the user can see location-specific Raw and Derived data; as well as, the next hierarchical level, which is the Coverage level information, for each Location, as shown in the second screen shot below.
You may correct or update any information in the RAW portion of any or all of these hierarchical sections (i.e. a policy level correction, a location level correction or a coverage level correction). Steps for correcting and updating data follow the screen shots below.


Errors are indicated in the Derived Data section. When you can fix the issue by modifying the raw data, located the corresponding field in the Raw data section, make the necessary correction and then click Save.
Correcting the missing or incorrect information on the screen then saving it causes the faulty record to be re-evaluated. If no further errors are found, the record is queued for processing.
You can choose to have the record bypassed during processing by clicking Ignore. The record will not automatically proceed to Derived Data.
If you have made changes and choose not to save them or if you decide to tackle the issue another way, you can click Cancel.
When selected the entire data hierarchy expands for all sections and subsections.
This saves all Raw data changes made in the record and re-processes the record/transaction.
Assuming that the record to be reviewed was not automatically presented when the Record Review window was opened, the user may click the Show Filter button to reveal that portion of the Record Review screen.
Click the image to change its size.
The user may either filter by the eight (8) fields at the top of the filter section OR use the three (3) fields at the bottom of the filter section (fields may not be interchanged, ie you cannot select two fields from the top and one from the bottom).
The Filter options are as follows:
Once filter selections are made, click the Apply button to apply the filters. The bottom section will populate with only those records that match the filter criteria defined.
If an error is made and the filters are incorrect or need to be changed or are not needed, click the Clear button to clear all entries made in the filter section.
At any time, the filter section can be hidden again by clicking on the Hide Filter button in the upper left-hand corner of the screen.